Blade Insertion/Removal/Replacement
|

|
Danger of electrostatic discharge!
Static electricity can harm delicate components inside the Shelf. An ESD
wrist strap must be worn before exchanging any part or electric component!
The ESD Wrist Strap Terminal (4 mm banana jack) is located at the upper
front side of the Shelf. |
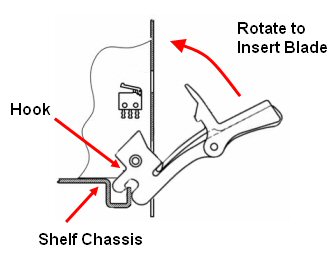
Blade Insertion
1. To insert the blades – engage the “hooks” on both
handles, and rotate both handles simultaneously towards the face of the
blade to force the blade back into the chassis.
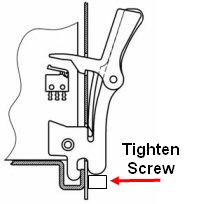
2. Secure blade by tightening screws top and bottom.
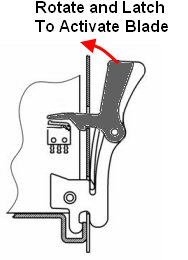
3. Pinch the spring lever to raise the finger and push hot swap handle
home through the faceplate. Release the spring lever to lower and retain
the handle. Failure to do this will erode the plastic and permit the handle
to release easily.
Blade Removal / Hot Swapping
Note: GPS 10M and 1Hz connections. The 10M and 1Hz should not be removed from
a live system. If the primary or secondary GPS SDRs are to be removed
the hot swap handle on the SDR should be activated, once the blue light
is on (not flashing) the GPS cables can be removed.
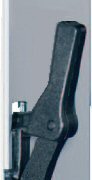
1. When a card is to be replaced,
release the hot swap handle by rotating the upper part of the handle to
the position shown in Figure 2 below.
Figure 1: Hot Swap Handle: Normal
Figure
2: Hot Swap Handle: Released (Hot
Swap Initiated)
2. The H/S blue light flashes – when it stops flashing and is permanently
on the board can be removed by unscrewing the top and bottom screws and
rotating both upper and lower handles forward to disengage card.
|
Hot swap LED (blue)
|
on |
board may be extracted |
|
long blink |
initialising |
|
short blink |
deactivating (hot swap requested but not ready) |
|
off |
board active, do not extract |