Use the following instructions to add a new user. After you have added users, ensure you click the Commit Changes button to activate your changes.
|
1.
|
|
2.
|
|
3.
|
|
4.
|
In the Alias field, enter the alias for this user. The Alias name appears on all broadband endpoints, and is used to identify users during transmission. WAVE users also use the alias to specify a connection when making Private Calls.
|
|
5.
|
|
A.
|
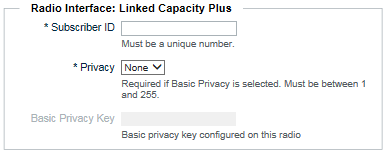
In Subscriber ID, enter the unique ID used in the Linked Capacity Plus radio system to identify this radio user. This ID can be found in the code plug of individual radio units.
|
|
B.
|
In Privacy, optionally select a privacy mode for this user. If Privacy is enabled for this user in the radio system, then match the type. If no Privacy is used, then select None.
|
|
C.
|
In Basic Privacy Key, enter the privacy key for this radio ID. The Privacy Key value can be found in the code plug for the radio.
|
|
6.
|
|
Important:
|
Clicking Save stores the user locally, but does not commit the new user to the system. You must click the commit changes to validate and activate the new configuration.
|
|
1.
|
|
2.
|
|
3.
|
|
4.
|
In the Alias field, enter the alias for this user. The Alias appears on all broadband endpoints, and is used to identify users during transmission. WAVE clients display the Alias in the Directory tab for Private Calling. Radio users only see this alias if their individual radio unit is programmed with a matching name for the WAVE user’s Subscriber ID.
|
|
5.
|
In the Username field, specify a Username. The Username is used as a sign-in name on mobile clients, and does not appear to other users.
 |
|
6.
|
In the Password field, specify a password. The password is used in conjunction with the sign-in name on WAVE clients.
|
|
7.
|
In Private Calls to Radios, enable or disable Private Calls to Radios. Disabling Private Calls does not affect Talk Group communication between broadband and radio users. Enabling Private Calls to radios does not block broadband to broadband Private Calls.
|
|
8.
|
In the Number of Simultaneous Sign-ins Allowed list (for WAVE users only) select the number of times a broadband user may sign-in simultaneously using more than one device. Note that multiple sign-ins each consume a license (CAL) on the WAVE 3000 Server when they are signed-in.
|
|
9.
|
Ensure the Active checkbox is selected if you want this WAVE user to be active in the system. Inactive users are disabled and cannot sign in, but can still be saved and activated later.
|
|
10.
|
In the Comments field, optionally enter comments. Comments do not appear outside the WAVE 3000 Server and for administrative purposes only.
 |
|
11.
|
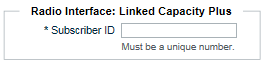
In the Radio Interface : Linked Capacity Plus field, optionally enter the ID used to identify this user in the system. IDs must be unique across all Talk Groups and Users.
 |
|
12.
|
|
Important:
|
Clicking Save stores the user locally, but does not commit the new user to the system. You must click the commit changes to validate and activate the new configuration. Until activated, the new user cannot sign in.
|