Monitoring Audio on MLC 8000 Analog Comparator Ports
Prerequisites:
- The MLC 8000 Configuration Tool is operational. See procedure Opening the MLC 8000 Configuration Tool.
- The channel cluster containing the MLC 8000 Analog Comparator you want to monitor is open and viewable from the main screen of the MLC 8000 Configuration Tool; it is configured.
When and where to use:
Use this procedure to monitor audio and SQM levels on MLC 8000 Analog Comparator ports.Procedure:
- Select the MLC 8000 Analog Comparator you want to monitor by clicking it in the channel cluster tree. Click the Audio Monitoring button or right-click the MLC 8000 Analog Comparator you selected and then click Audio Monitoring and Calibration.
If there are 3 or fewer MLC 8000 Subsite Link Converters associated with the MLC 8000 Analog Comparator, by default, the Voter Audio Monitoring and Calibration window opens and all voting nodes are selected and displayed. Skip step 2 and continue with step 3 (only step 2 should be skipped).
MLC 8000 Configuration Tool Voter Audio Monitoring and Calibration Window 
Or, if there are more than three voting base radios associated with the MLC 8000 Analog Comparator, a Voter Audio Monitoring dialog box appears telling you that you must select the base radios to monitor. Click OK and then the Voting BR Selection for Audio Monitoring window appears. Continue with step 2.
MLC 8000 Configuration Tool Voting BR Selection for Audio Monitoring Window 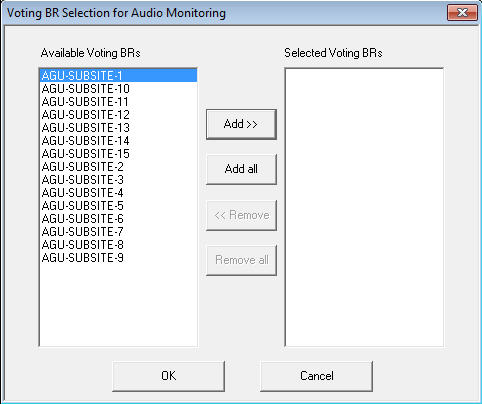
- From the Voting BR Selection for Audio Monitoring window, choose up to three voting base radios you want to monitor by selecting the voting base radios from the Available Voting BRs column. Click Add to move the voting base radios to the Selected Voting BRs column. Once you are happy with your selection, click OK.
MLC 8000 Configuration Tool Voting BR Selection for Audio Monitoring Window Choices 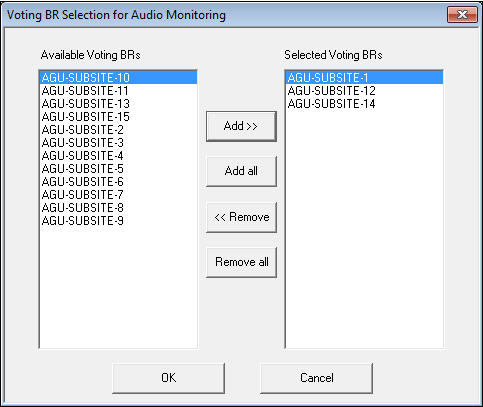 The Voting BR Selection for Audio Monitoring window closes and the Voter Audio Monitoring and Calibration window appears.
 - If you do not wish to monitor input audio on a specific base radio, uncheck the On box for that particular base radio.
- Set the duration of the test in seconds using the drop-down menu in the Test Duration field. Select a value from 2 to 10 seconds.
- Click Start.
The system performs audio monitoring for the specified time in seconds and the results appear in the window to the right of the voting BRs area. The unit for the left scale, -30000 to 30000, is Digital amplitude values expressed in 16 bits digits.
- To see the results in more detail from a particular time during the audio monitoring, frame the time duration with the left mouse button. Click Zoom In to zoom in on that area or click Zoom Out to see a larger area of the results. Click Home to return to the full results of the test in the display window.
- To change the voting base radios you want to monitor, click Select BRs on the Voter Audio Monitoring and Calibration window. Use the buttons on the Voting BR Selection for Audio Monitoring window to add or remove the voting base radios you want to monitor. When you are happy with your selection, click OK.
- To save the results for later analysis, click Save Audio Files.
The path to the saved file displays. It saves in a file name similar to: 203-r1@Channel_A_06_Oct_2011_19-38-48.wav where:
- 203–r1 is the resource name
- Channel_A is the channel name
- 06_Oct_2011 is the date
- 19-38-48 is the time stamp