The users you create here should match the users you created in the XRT 9000/9100 Gateway. For instructions on adding users to the XRT 9000/9100 Gateway, see Adding Users and Groups to the XRT 9000/9100
|
1.
|
|
2.
|
|
4.
|
In the Alias field, enter the alias for this user. The Alias appears on all WAVE clients and is used to identify users during transmission and to select other users for Private Calls.
 |
|
5.
|
In the Username field (for WAVE users only) specify a Username. The Username is used as a sign-in name on mobile clients, and does not appear to other users.
|
|
6.
|
In the Password field (for WAVE users only) specify a password. The password is used in conjunction with the sign-in name on mobile clients.
|
|
7.
|
In Private Calls to Radios (for WAVE users only) enable or disable Private Calls to Radios. Enabling Private Calls to Radios for broadband users consumes a Talk Path on the XRT 9000/9100. This does not affect Talk Group communication between broadband and radio users. Disabling Private Calls to radios does not block broadband to broadband Private Calls.
|
|
8.
|
In the Number of Simultaneous Sign-ins Allowed list (for WAVE users only) select the number of times a WAVE user may sign-in simultaneously using more than one device. Note that multiple sign-ins each consume a license (CAL) on the WAVE 3000 Server when they are signed-in.
|
|
9.
|
Ensure the Active checkbox is selected if you want this WAVE user to be active in the system. Inactive users are disabled and cannot sign in, but can still be saved and activated later.
|
|
10.
|
In the Comments field, optionally enter comments. This field is for administrative use and text entered here does not appear on radio or mobile clients.
 |
|
11.
|
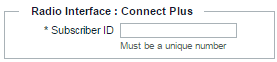
In the Radio Interface: Connect Plus field, optionally enter the ID used to identify this user in the system. IDs must be unique across all Talk Groups and Users.
 |
|
Important:
|
Broadband users without a Subscriber ID will be identified to the Connect Plus radios using the ID specified in Setup > Radio System Interface > Anonymous User.
|
|
12.
|
|
Important:
|
Do not click Commit Changes until you have created all Talk Groups and associated them with users. The next two sections provide instructions. If you click Commit Changes now, all users will be invalidated because they have no associated Talk Groups.
|