 Note: Click Back
at any time to return to the previous menu page.
 WiMAXWeb allows you to define frequency channels for uplink and downlink channels. You can define a frequency band range and then define the channels that can be used in this range. The EasyST/ProST scans these defined channels to seek viable frequency channels (one for uplink and one for downlink) to communicate with the ASMAX BS TRx. The channel size is 3.5 MHz (3.5 MHz-separation between consecutive channels) and the maximum number of channels is 32.
 Note: Click Back
at any time to return to the previous menu page.
Access the Advanced page (see Accessing the Advanced Page).
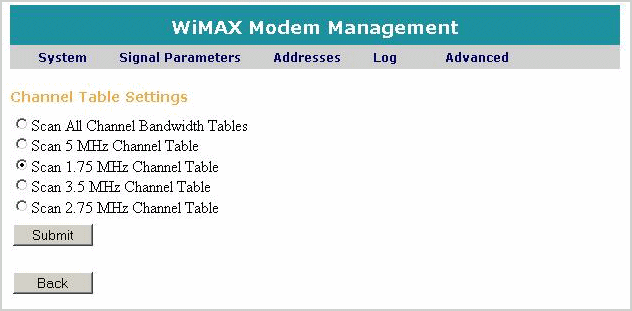
In the Advanced page, select Channel Table Settings and click Select. The Channel Table Settings page appears, as shown below.

Select either to:
Scan All Channel Bandwidth Tables - to scan all channel bandwidth tables
Scan 5 MHz Channel Table - to scan channel bandwidth table in 5 MHz increments
Scan 1.75 MHz Channel Table - to scan channel bandwidth table in 1.75 MHz increments
Scan 3.5 MHz Channel Table - to scan channel bandwidth table in 3.5 MHz increments
Scan 2.75 MHz Channel Table - to scan channel bandwidth table in 2.75 MHz increments
 Note: High and Low refer
to a single Channel spacing in each band. High refers to the larger channel
spacing and low refers to the smaller one.
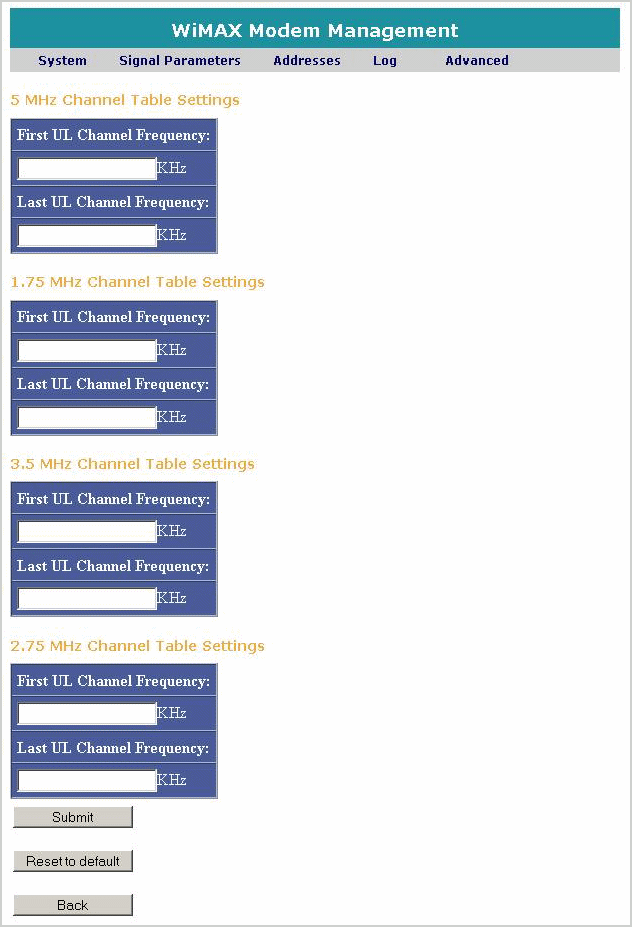
In the Channel Table Settings page, click Submit. The Channel Table Settings page appears, as shown below.
Alternatively click Back to return to the Advanced page without defining uplink and downlink frequency channels.

 Note: Select Reset
to default to reset the device to the factory default Channel settings
and replace the user-defined settings.
 Note: The frequencies
shown are for illustration purposes only, the frequency range of your
specific model will be displayed
For each Channel Table Settings define:
In the First UL Channel Frequency field, enter the first frequency of the Frequency Channel table for the uplink communication.
In the Last UL Channel Frequency field, enter the last frequency of the Frequency Channel table for the downlink communication.
 Note: By default all
the Status Channel IDs are selected (checked). When other settings are
selected (not default) the range is according to the table settings range.
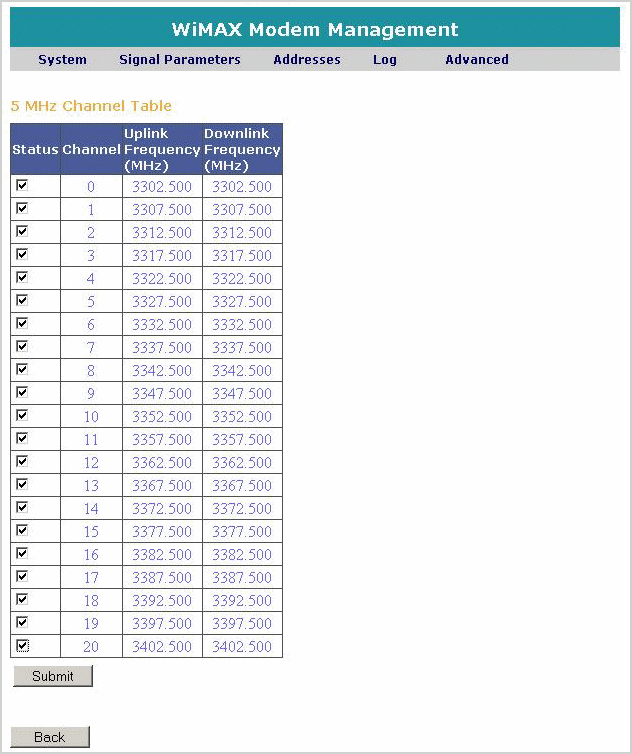
Click Submit. The Channel table appears, indicating the frequencies used for the uplink and downlink channels.
 Note: Check boxes with a check mark
indicate that the corresponding channel will be scanned for viable communication
with the ASMAX
BS TRx.
 Note: The table below is an example
of the 5 MHz Channel Table display.

Clear (un-check) the Channel IDs not to be scanned

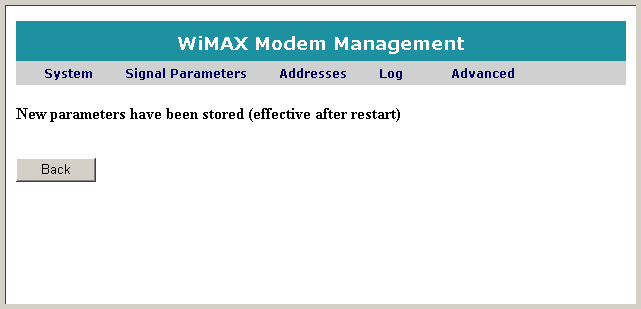
To apply the new frequency channel settings to the unit, you need to restart the unit. Click Back to return to the Advanced page, and then follow the restart instructions in Restarting the Unit .
 Note: In the event the
product type is an EasyST with a SIM card, the SIM content will override
the configured values.