This topic covers
Addition of Shelf Manager Achieving Dual Redundancy
Removal of Redundant Shelf Manager
Replacement of Non-Active Shelf Manager from Dual Redundant Pair
Replacement of Active Shelf Manager
This procedure is used to introduce dual redundancy in terms of shelf manager availability.
1. Insert the additional shelf manager into the available management slot, but do not push the hot swap handle fully home. The blue hot-swap LED should be permanently on. Attach the LAT cable between the shelf manager serial port on the SAP and the commissioning/maintenance laptop, with a terminal session configured as detailed in section Connecting to Shelf Manager. Before pushing the hot-swap handle fully home, be aware that it will be required to interrupt the Linux boot process and arrive at the ARM boot prompt. This is done by hitting any key (repeatedly if preferred, rather than reading feedback and timing the keystroke to the window of opportunity) as soon as the boot sequence starts. Now, push the hot-swap handle home and interrupt the boot sequence
2. Configure the IP network definitions, the root user password, and the date/time of the additional shelf manager via LAT. See Shelf Configuration
3. Switchover from the active to the backup shelf manager via LAT/telnet or web interface See Checking Dual Redundant Operation
4. Repeat Switchover (just to ensure it works in both directions).
This simple procedure does not involve any keyed input. Irrespective of whether the shelf manager is being removed due to a fault, or simply because it is being relocated, the task is the same. Flick the hot-swap handle outwards causing the blue hot-swap LED to flash, indicating that deactivation has been requested. Once deactivation completes, the blue LED will be permanently illuminated. At this point the fixing screw may be released, the hot-swap handle fully retracted and the shelf manager removed.
No action is required on the remaining, active shelf manager.
This procedure is fully described by following 2 and 1 above respectively
This would only occur in a single shelf manager configuration due to the fact that a switchover would have occurred in a dual redundant configuration and we would therefore be replacing the non-active shelf manager. This procedure can be achieved by executing procedures 2 and 1 respectively.
Login to the shelf manager as root
sentry login: root
Password:
enter the shelf manager command line interface
# clia
CLI>
Initiate the switchover using the switchover command. Note, this happens to be from the active shelf manager in this instance, but this is one of the few CLI commands which will work on the backup shelf manager.
CLI> switchover
This Shelf Manager is now active, but is shutting down to trigger a switchover
CLI>
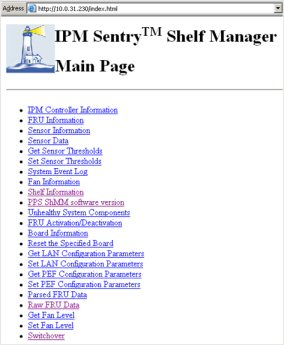
Bring up a web browser and enter the local or network IP address of the active shelf manager (in fact either shelf manager as the IP address is shared). The following web page will be displayed:
From here, simply select the Switchover link and submit the request. The response will show that the active manager is shutting down.